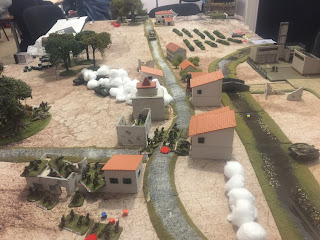
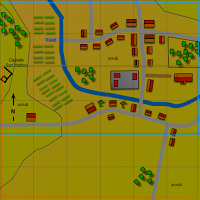
Split into two halves on two rather separated club nights (largely due to the umpire (me) not having time to build the northern half of San Marco!).
Initial assault (red table area)
The British advanced largely up the right flank, with 7 Platoon in the lead, under cover of a smoke barrage from the supporting 25 pounder. They came under some heavy MG fire from the church, and in an attempt to root that out, their supporting Churchill CS had its 90mm gun knocked out by a StuG III.
 |
Initial assault from the eastern end – note the large smoke
barrage centre table. 7 Platoon close-assaulting across the
road centre of picture. |
After a fairly gritty firefight, the Germans, taking heavy losses to the advanced Nr. 1 Zug, chose to fall back across the river, and the British were thwarted by a well placed minefield (just south of the bridge) from following before the bridge was blown up. As the river was somewhat tricky to cross, they elected to consolidate their position and renew the assault after a couple of hours.
Followup assault (blue table area)
 |
Followup action – the calm before the storm. The villa roof
is just visible bottom left. |
Some fairly heated discussion at the British O group led to an original plan to feint an attack towards the vineyards and Castello San Marco, while gong for a main thrust towards the church. This (as ever, perhaps) didn’t survive contact with the enemy, as initial probes revealed no German forces south of the ford on the British side of the river. (There was a fascinating almost ‚pre-game‘ of cat and mouse with blinds, with a lot of missed spotting rolls, but some excellent use of blinds by the British.)
 |
| The Villa, and Castello San Marco |
7 Platoon (with a scratch section made up of Nos 2 and 3 sections), thus went in up the left flank via the unoccupied villa, seeking to cross the river by the vineyard. 8 Platoon, meanwhile, pushed across on the extreme right, encountering no resistance to taking the church. A Spitfire dropped its 500lb bomb load roughly in the middle of town, causing some consternation among the Germans but little serious damage.
 |
If you go down to the woods
today… |
About the point 7 Platoon splashed across the river, a Tiger was revealed in the woods north of the castle (spotted by a dummy blind that had been advancing up the extreme left and making excellent use of the topography and available cover not to be spotted itself). The Spit, to the frustration of the ground troops, turned for home before spotting it (anything but a 1 would have done for it to stick around).
The British deployed their armour off blinds (a troop of Sherman IIIs and a Firefly), and proceeded to unload on the factory, reducing the chimney to rubble and generally doing a fair bit of damage.
Over on the right. 8 Platoon pushed into the orchard and came under heavy fire from the building that overlooked it, as well as a well-placed stonk from the Germans‘ 8cm mortars. Unfortunately for the Germans, the section defending that flank was the rather tattered remnants of Nr. 1 Zug, who came under a withering storm of return rifle and Bren fire. Meanwhile, the Firefly (after Ash had actually read its stats line and realised that the 17 pounder is definitely a match for the Tiger :D) poked its nose round the side of a house on the south bank and popped off a round at the Tiger. 6 hits to 4 saves – gun out! Jubilation from the British, and it looks like Unteroffizer Honisch will not be getting promoted to Junior Ace this time out.
 |
Bridge out? No problem!
(Churchill ARK by Skytrex.) |
7 Platoon (not for the first time in and around San Marco) take a fair amount of hammer from the factory and an MG in the house by the ford: the scratch section manages to stick around, but No. 1 Section bails (0 actions, lots of shock). Meanwhile, the German Nr. 1 Zug also bails (its Big Man unpins it and has it retreat), and Nr 2 decides the factory is becoming untenable.
About this point, another British blind, that’s been largely keeping out of sight, deploys at the river’s edge – a Churchill ARK, which uses all its actions to drop ramps and provide a river crossing for (what I assume was) Platoon 9, advancing on blinds behind Platoon 7.
About here is where we called it for the night. The Germans are surrounded on three sides, from 8 Platoon advancing from the orchard, 7 and 9 through the woods to the factory, and the Grantas who will be pushing across the ARK to lend fire support.
In short, a British victory.

