Battle of McDowell – Part 2
 |
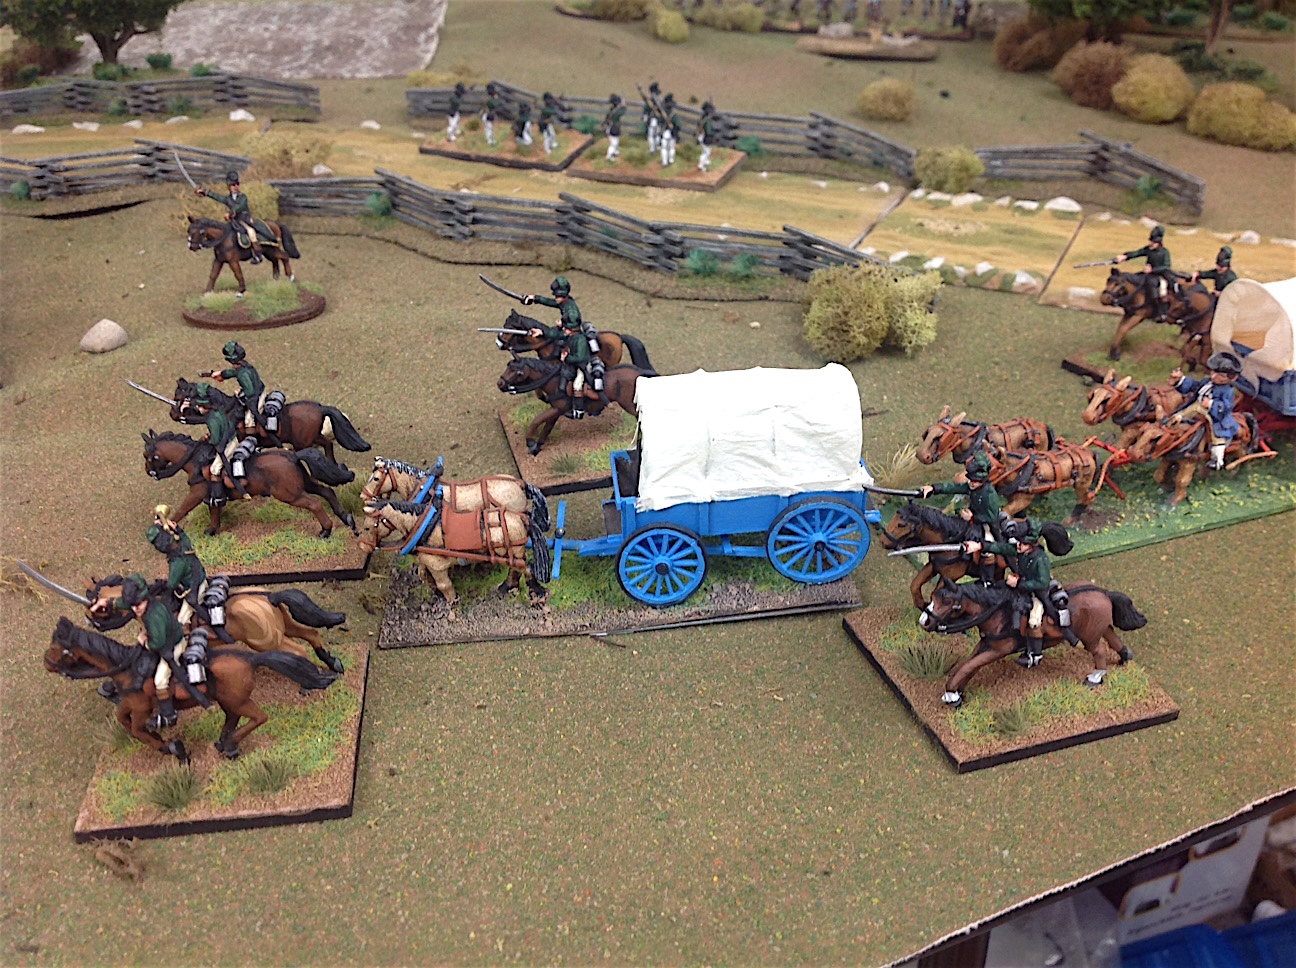
| British Legion cavalry chase down the American baggage train. (click picture to enlarge) |
To recap our battle so far, Colonel Sevier’s American (rebel) force of 6SPs was taking on Tarleton’s British force of 3SPs at the town of McDowell. Sevier posted Captain Ray’s militia in the town with orders to delay the British advance for a couple of turns and then retire into the nearby Center Woods. Other militia units were hidden in the West Woods (Captain Hopkins), the Center Woods (Captain Kent) and the East Woods (Captain Vickers).
So our last posting ended with Turn 4, when Captain Ray’s militia ran for the cover of the Center Woods, with Tarleton’s British Legion cavalry riding pell mell down the road to catch up with the rebel baggage train, and the revealing of the rebel militia in all three woods.
Read the picture captions below to follow the developments of Phase 2 of the battle: the routing of all the militia and the capture of the baggage train.
 |
| Ray’s militia find support from Kent’s militia in the center woods. Is there room enough for both regiments to skulk? |
 |
| Meanwhile, over in the West Woods, the British Light companies spring an ambush by Hopkins‘ militia. |
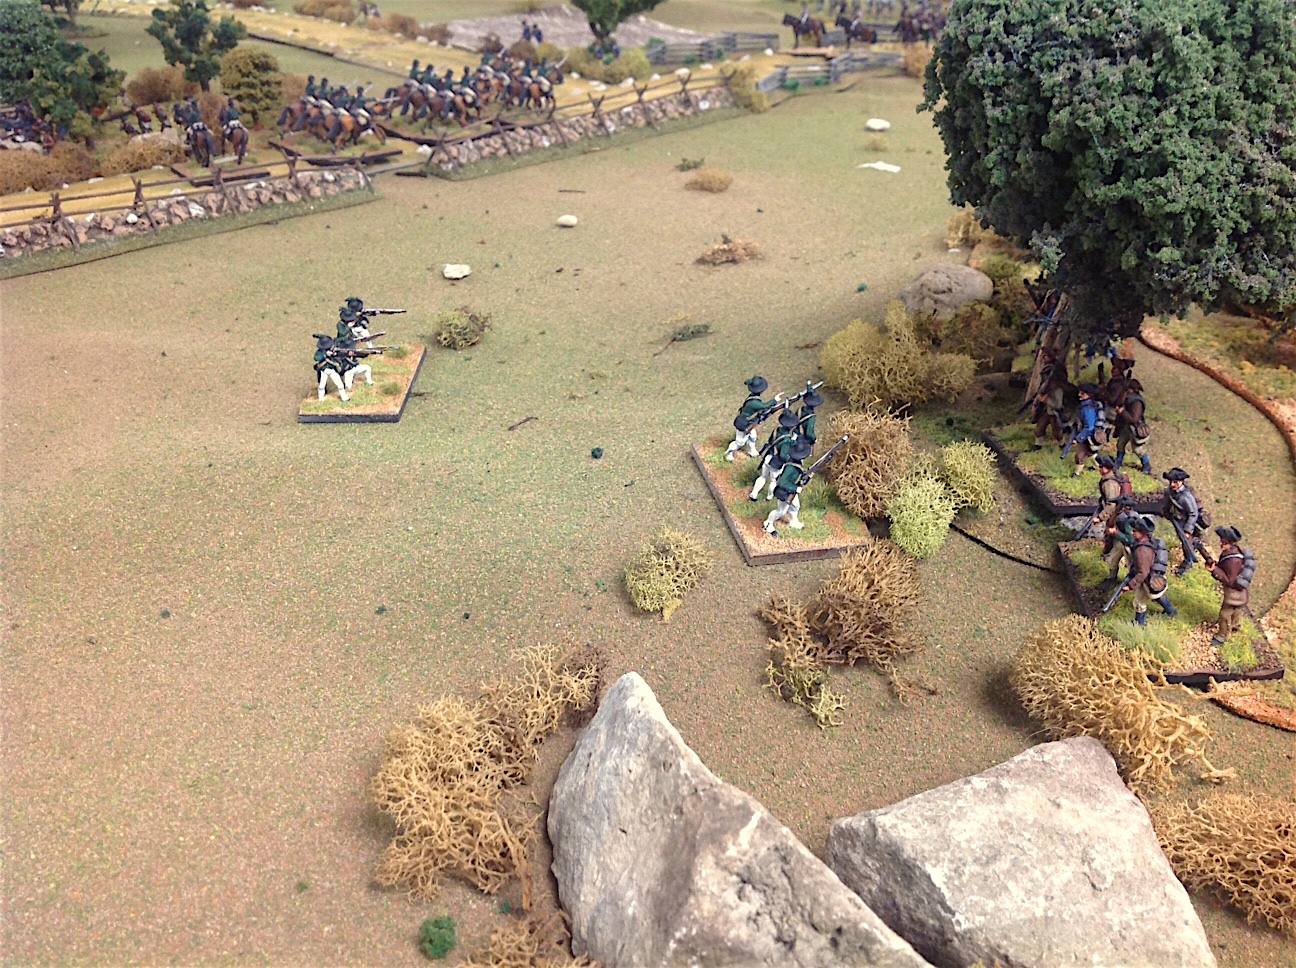 |
| British Legion riflemen spy more rebel militia in the East Woods. A few well aimed shots hit their mark, and Captain Vickers‘ militia decide that they have seen enough and run for their lives |
 |
| Captain Kent’s militia abandon the safety of the Center Woods to see if they can find out where Captain Ray went. |
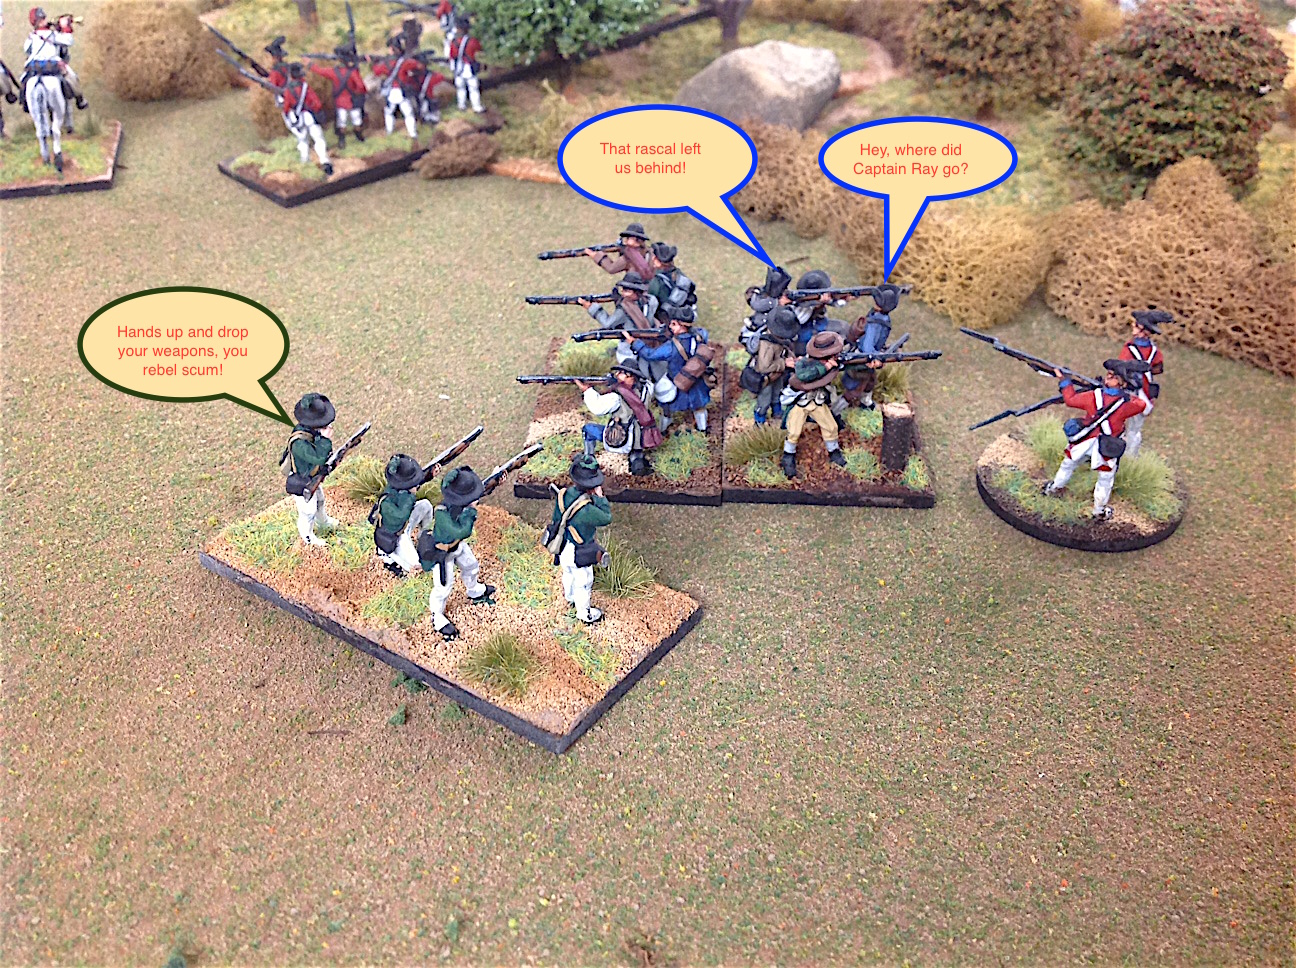 |
| Ray’s militia are surrounded and decide that surrender is better than pointless valor. However, they are not particularly happy with You Know Who. (click picture to read annotations) |
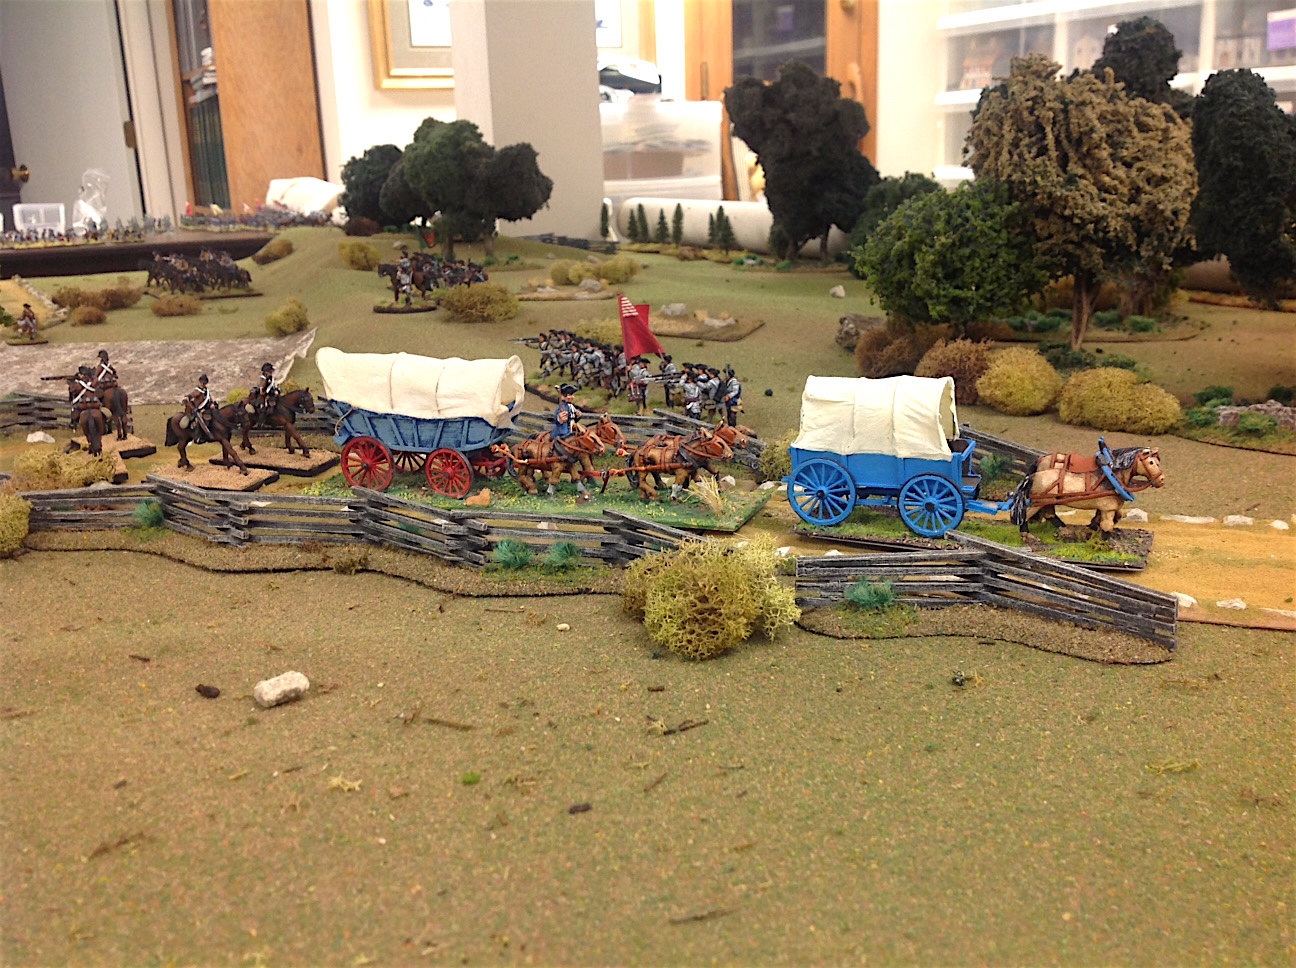 |
| The American (rebel) baggage train moves painfully slow down the road. |
 |
| The British Legion cavalry are hot in pursuit. |
 |
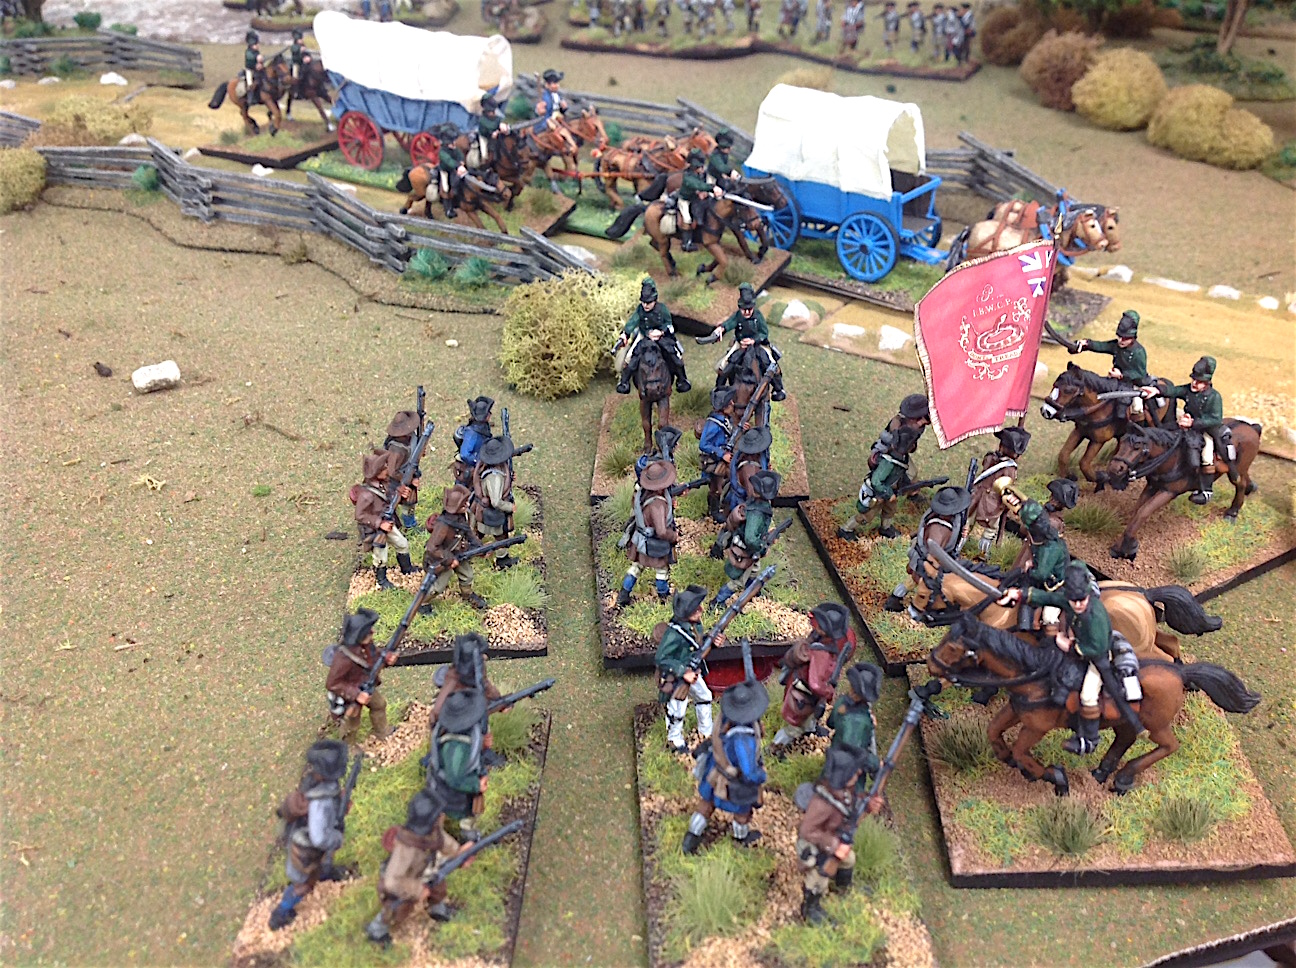
| They get in and among the baggage train and cut down the escorts, but spare the civilian drivers (who might come in handy real soon). |
 |
| What’s this? Vickers‘ militia routs out of the East Woods and right into the lap of the British Legion cavalry, who promptly serve up some Tarleton’s Quarter and cut them all down. |
 |
| With the prisoners taken care of, Tarleton’s cavalry escort the rebel baggage train to the rear. No doubt they have some looting in mind. Tarleton is in the background watching one of his squadrons skulk off to the rear. He is not happy. |
Well, Phase 2, which covered the fight between the four militia regiments posted in the three woods and the British forces, did not have a happy ending for the Americans.
Two of their militia regiments (Ray’s and Vickers‘) were routed or destroyed and the other two regiments (Hopkins‘ and Kent’s) retired in good order back to Thickety Ridge, where Sevier’s two Continental regiments were deployed.
The Fife & Drum rules administer a heavy penalty to troops without bayonets (such as militia) fighting troops with bayonets. And once the British player figured this little cookie out, he charged his infantry nearly every turn when he confronted militia troops. In a melee, the unit with bayonets needs a 9 or less on a D10 die to score a hit while the unit without bayonets can only score a hit on a 1 on a D10. In other words, it’s nearly impossible for the British to not kill rebel militia in a melee, and it’s nearly impossible for the militia to put any hits on the British infantry. So you can see why the militia started falling back or evading British charges.
That’s where we will end the report for today. Phase 3, the final phase of the battle, will be posted later this week and tell the tale of the last stand of Colonel Sevier on Thickety Ridge. And we may also find out what happened to Captain Ray.
Dieser Artikel stammt von einer der angeschlossenen Quellen. Bitte honoriere die Arbeit der Autoren indem du ihren Webseite besuchst.
Artikelquelle besuchen
Autor: Der Alte FritzDer Alte Fritz JournalDer Alte Fritz JournalDer Alte Fritz Journal
Powered by WPeMatico