I had a fairly manic Friday-Monday, but even so I wanted to run another go with the Highlanders after Prestonpans. The model for this encounter was Falkirk, but I did away with the pesky ravine and the need for rules covering fighting in the dark and rain.
Unable to find a kilt, Chris came in a yellow tartan weskit and a neck stock. That makes him a fine choice for a loyalist lowlander, so I gave him the British. Phil was anticipating commanding a train in an RCW game, so came in his Strelnikov cap. He and Tim took command of the Jacobites.
The Highlanders immediately launched a charge on their right to disperse the British cavalry, supported by their own mounted troops out on the right wing.
This mostly went their way, and the British horse were driven back towards their base line. Or routed. It didn’t help that their cavalry brigadier was killed in the melee, especially as Chris had saved his command chip to use in the morale roll that occurred after he died.
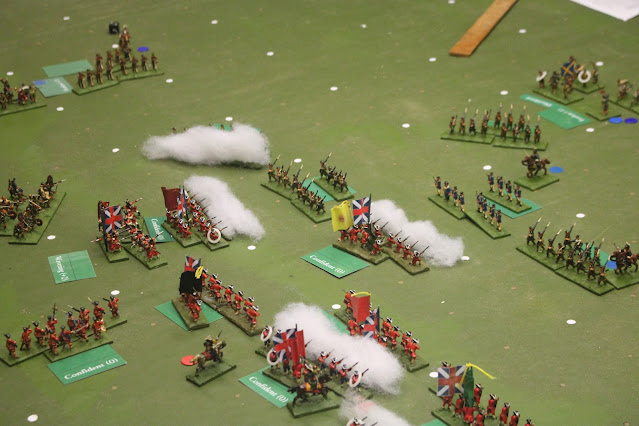
The inevitable Highland charge occurred all along the battle line. Several of the British units were intimidated…things weren’t looking good for them.
The musketry fire rolled along the front, causing some disorder and casualties. The Highland volley during the charge was completely ineffective (twelve dice, no sixes)
Overall, the British did okay in the hand to hand. The left hand unit was driven back on its supports. The unit with the yellow colonel’s colour broke their opponents, with a combination of platoon fire and nifty bayonet work.
With the addition of supports, the left hand battalion drove the clansmen back. The yellow flagged unit stepped forwards to deter further charges. Elsewhere the line buckled but did not break (Tim rolled some really poor dice).
The British infantry line was steadily gaining the upper hand, although the left wing cavalry had been completely broken. Phil needed to develop the encirclement option open to him, if only he could control his kilties. Tim brought up his second line of lowlanders to try to stabilise the situation.
Phil has got his cavalry round to attack the flank. Chris has one cavalry unit hanging on.
Shaken and Unsteady they maybe, but the Royal Scots are clinging on. As the clan leader of their opponents exhorts his men onwards, he is killed in the fight. That six is the morale roll to stand. Chris needed a 6 or it was all over.
On the left Chris is rushing his reserves to bolster the faltering flank. On the right he has managed to maintain a stand off, which suits him more than it suits Tim.
The main attack seems to have ebbed, and Chris may have survived the crisis point.
Chris‘ last cavalry unit has been caught by Phil’s cavalry, and is heading off table, hotly pursued. On the edge of the picture you can see a couple of clan units back on the table after chasing their opponents off.
One of these rallied clans is now heading for the rear of British line. Chris‘ support line about faces smartly, but not quickly enough to deliver a volley.
The Lowland infantry have now closed and will start to deliver their fire into the battered British battalions. On the left, against all the odds, Chris‘ infantry have survived the clan charge.
This enables Chris to deliver a flank attack with his reserves, the brave men of the Glasgow Militia, which breaks the Highlanders. Elsewhere, Chris has performed a passage of lines where needed and has his fresh units in the front line. He has weathered the storm.
A really tense game. The Jacobites were let down by some poor dice rolling in the centre. The complete failure to get even one hit from the charging musketry was one of the deciding factors in none of the British battalions breaking on impact. Sufficient damage was done to the clans that whilst they weren’t broken they were in no fit state to attack again. As darkness fell, the British were left in possession of the field. Perhaps some of their cavalry will be able to return to the army when things quieten down. Unless they have already ridden to Edinburgh to spread fear and alarm.


