The Battle of Liegnitz 1760 fought solo. Turn 4
Initiative A10 / P5:
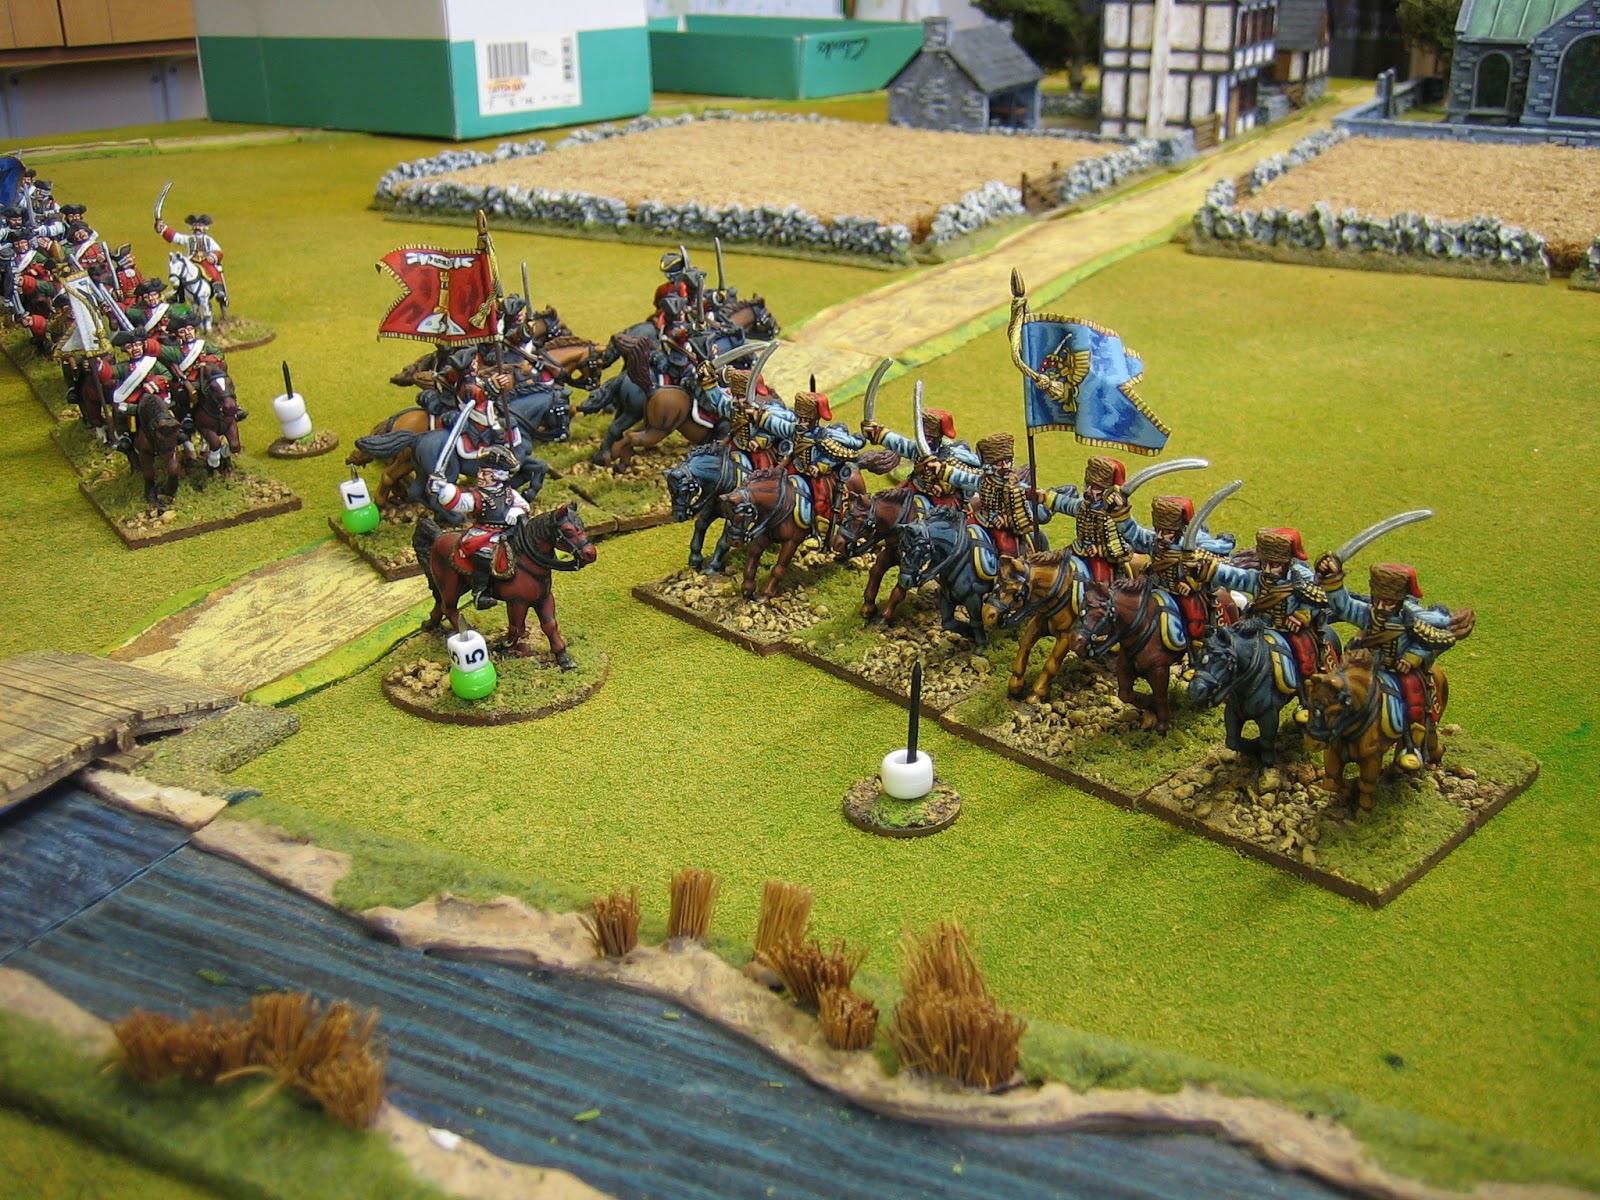
The remaining Austrian artillery battery in front of Panten repositions to blast the Prussians occupying it at close range. The fire rips through the village like a knife through butter, scything down Prussians and civilians alike (PIR2 takes 3UI loss, shaken).
Behind the line of the stream the commander of the vanguard cavalry of the ‚First Line‘ proves his worth by rallying two units of cavalry (ADR6 & AHR24). Muller attaches to his last unit of grenadiers, it’s now for death or glory.
Meanwhile, up on the slopes of the plateau, some tired Prussian artillery discomfort more Austrians (1UI loss) whilst the dragoons under Meineck move forward to support the infantry operating on their right wing.

Initiative A8 / P0:
At the summit of the slope the Austrian grenadiers, now under the personal command of Muller, break through the Prussian line following a point blank firefight with PIR5 with surprisingly little loss to themselves. The rout of PIR5 disorders the battery of howitzers stationed immediately behind their rear. Then the Austrian grenadiers engage PCGIV but this time the firefight goes the other way and the grenadiers are routed.
(I’m having a lot of fun at this point and I’m making loud ‚massed musketry‘ noises: Ahh, the joys of solo play! The initiative continues into the next picture).

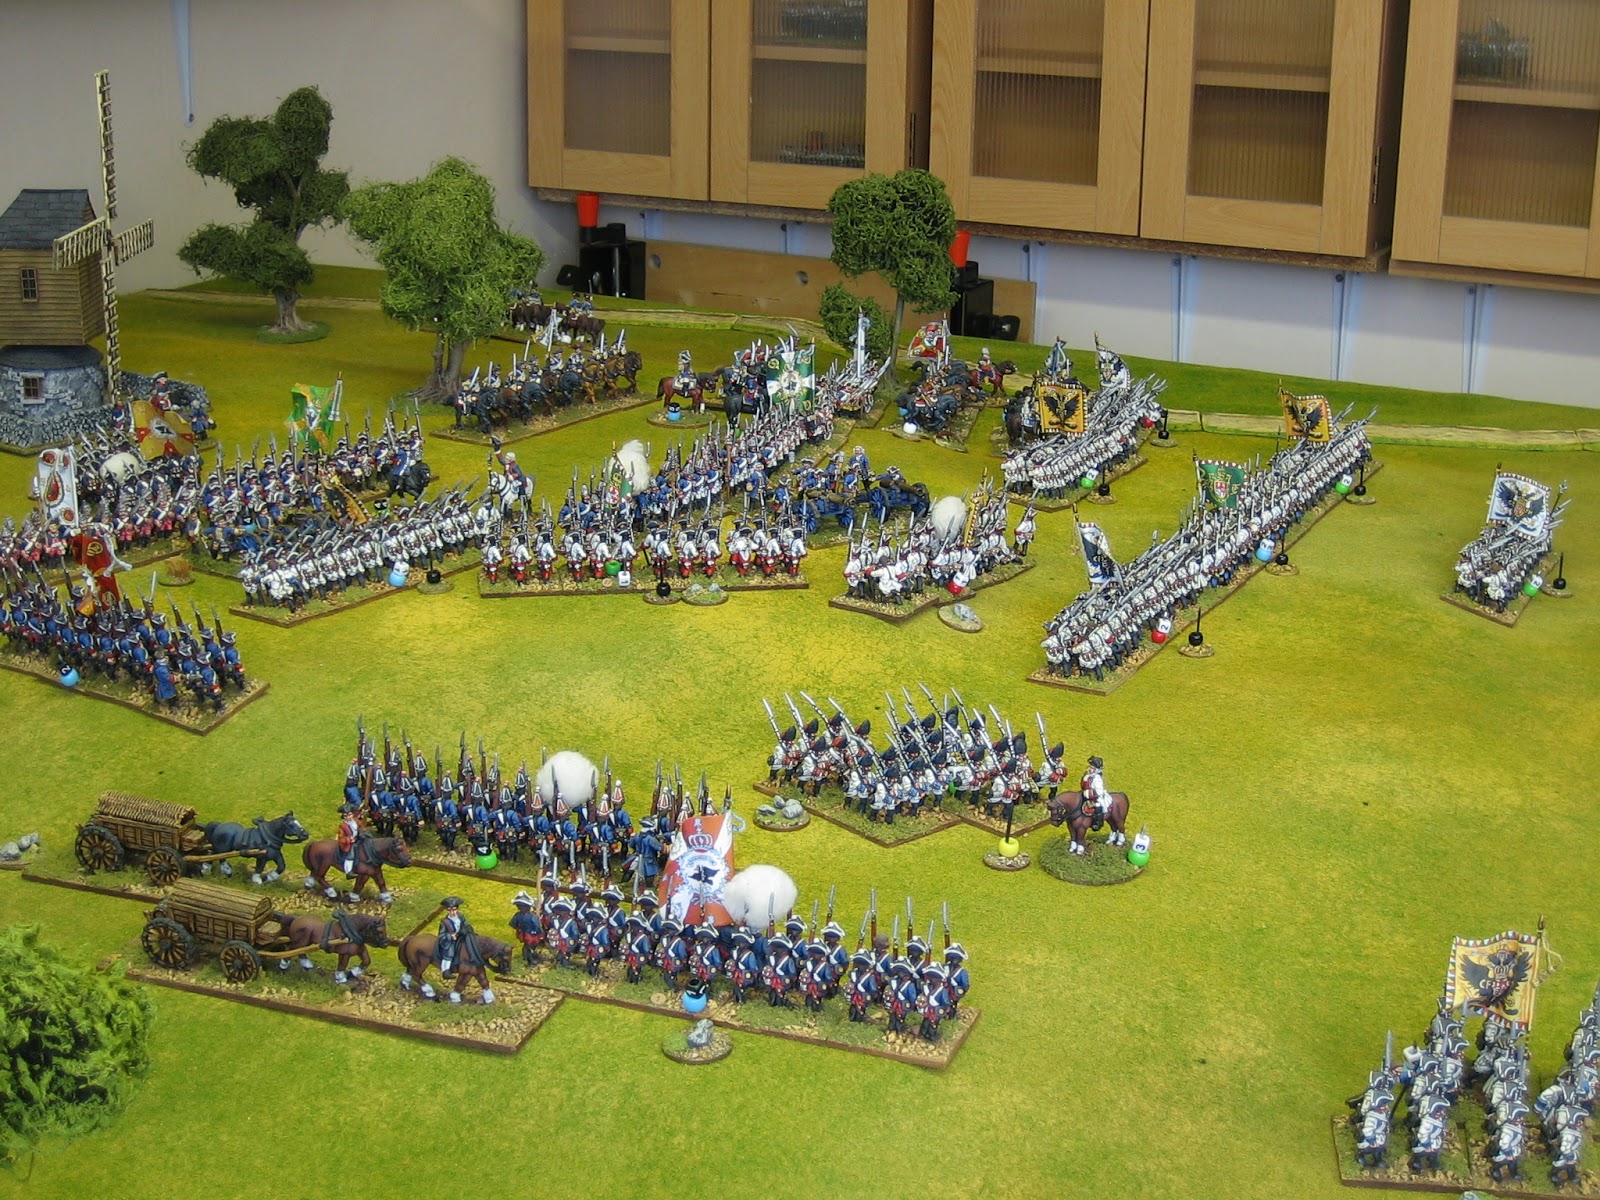
The Austrians have a chance to sieze the battle by the scruff of the neck (with an unused Infantry Move card showing). The assaulting troops of the ‚First Line‘ advance into the breach.
The ‚Second Line‘ advances in support but, the problems caused by their routing cavalry earlier in the morning have created a definite gap between the attacks – the support is not ‚close support‘
Initiative P7 / A3:
The Prussian cavalry falls back before the advance of the Austrian infantry in an attempt to reach comparative safety behind their infantry line.
To the south, the Prussian infantry turn to face the breakthrough (on a timely Brilliant Leader sequence card).
(Brilliant leader cards are not standard cards. They are issued to army’s with good command and command structures: Frederick is a ’superior commander and has two, Loudon is skilled and has one. They are ‚wild‘ cards).
Meanwhile the advance of the Austrian infantry is relentless. They are ignoring the threat to their left flank – they must break the Prussian line!

Initiative A12 / P4:
At the summit of the slope AIR34 pours volley after volley into PCGIV and the grenadiers are routed due to losses (4UI).
On the right the ‚Second Line‘ comes into the fray. AIR14 and AIR22 fire into the teeth of the Prussian cuirassier which have failed to fully withdraw (PCR11 takes 3UI loss and shaken).
On the left, at Panten, at Panten AIR29 and AIR50 pour their first fire int stricken PIR2 and it is shattered, streaming from the village in all directions (destroyed).
Back up the slope, AIR14 continues its fusilade into the unfortunate CIR11 which is already a bloody mess and its remnants withdraw from the field (destroyed).
At the breakthrough, AIR36 empties its first volley into the howitzers and the howitzers, not to be outdone, respond with canister at point blank range (both take 2UI loss) but, it is the artillery crew who lose their nerve first and bolt to the rear.
(The action this phase continues into the next picture).

The Prussians launch a counter attack as best they can (with only 4 initiative pips) and PIR14 strikes AIR36 in the flank with perfect timing (no melee resolution card required Vs flanks) – it should be a walk over but the Austrians hold the initial rush and the combat is fought again (front to front). AIR36 finally gives way (with 2UI loss but, it can’t safely rout anywhere so it surrenders).
(Sometimes logic outways any amount of angle wangling and, as so many Austrians did surrender at the top of the slope, this seemed logical to me).

Initiative: P9 / A1:
PIR40 of the Prussian reserve now charges forward into the flank of AIR37, routing it at a stroke. Again, the Austrian unit has no clear path of escape so it too surrenders (with 4UI loss).
PCGIV pour fire into AIR3 and they run (with 4UI loss).
The battle is again decidedly turning in favour of the Prussians.

The Prussians deploy their artillery in a position to rake the advancing Austrian infantry, and to cover any reversal at Panten.
To the north of Panten (not in shot as this was taken later) the pursuing Prussian cuirassier (PCR 5) have find their path blocked by fresh Austrian cavalry and are milling about in front of the Austrian guns. The guns fire into the mass of swirling troopers and the remnants stream away (destroyed).
This leaves the way clear for the fresh Austrian cavalry (‚First Line‘ rearward cavalry command) to come forward.

Initiative A7 / P2:
Austrian cavalry (ACR25) charge up the slope into the newly deployed Brummers (they have already taken 2UI loss so they are easily beaten) and the crew are trampled into the dust. The Austrians have exhausted their deck but do not have an initiative point to end the turn.
Austria fails it’s first major morale check (add two Dress the Lines cards) but the armies brigade commanders hold things together nicely (2 morale points lost).
As I said earlier in this series of extended battle reports, the Major Morale card rules we use are somewhat different to the ones used as standard. Here, as written in our rules, is how we play them:
The Austrians win the next initiative and end the turn.
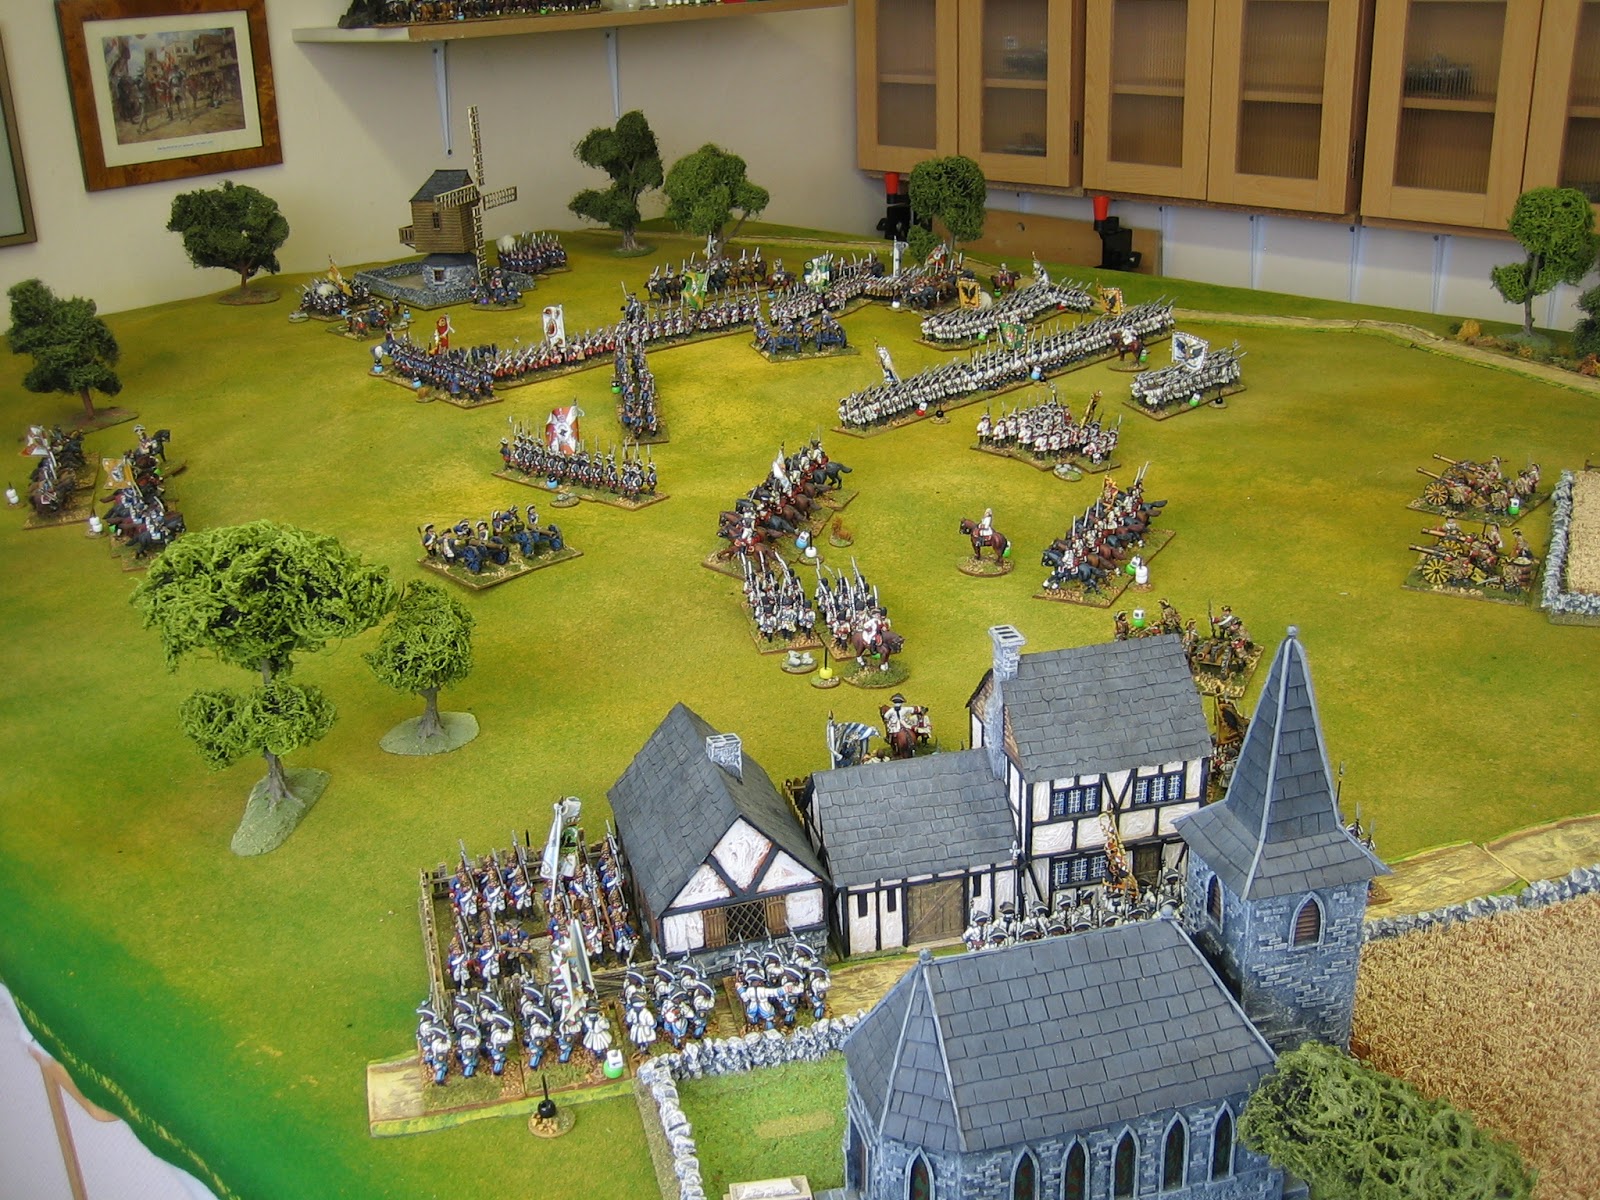 |
| The Position at the end of turn 4. |
Dieser Artikel stammt von einer der angeschlossenen Quellen. Bitte honoriere die Arbeit der Autoren indem du ihren Webseite besuchst.
Artikelquelle besuchen
Autor: JAMES ROACHOlicanalad’s GamesOlicanalad’s GamesOlicanalad’s Games
Powered by WPeMatico