Ambush at Westbury Plantation, South Carolina Campaign
 |
| British light companies (red coats) and Ferguson’s Rifles (green coats) chase off one of the American militia units. The intense firefight at the crossroads can be seen in the background, in the clouds of smoke from the musketry. All figures are from Fife & Drum Miniatures and the log cabins are from In The Grand Manner buildings. |
British Forces – Lord Rawdon commanding
2 regiments of British regulars
1 regiment of Loyalists
1 composite unit of light infantry
Patriot Forces – Francis Marion commanding
1 regiment of Marion’s Mounted Militia (3rd)
3 regiments of militia
Objectives
The Patriots need to destroy at least one strength point (SP) of British/Loyalist troops. Extra points for capturing any of the supply wagons in the British wagon train.
Brtish objective is to escort their wagon train across the table and off the table edge.
The side that achieves its objective first wins the game.
Table Top Terrain and Ground Rules
Rules
I used my own „Fife & Drum Rules for the AWI“ which you can download for free from the Fife and Drum Miniatures webstore site.
Scenario Location
 |
| Map of South Carolina illustrating the location of the action at the Westbury Plantation, on the road between Nelson’s Ferry and the British fortified depot at Camden. Click or double click the map to enlarge the view. |
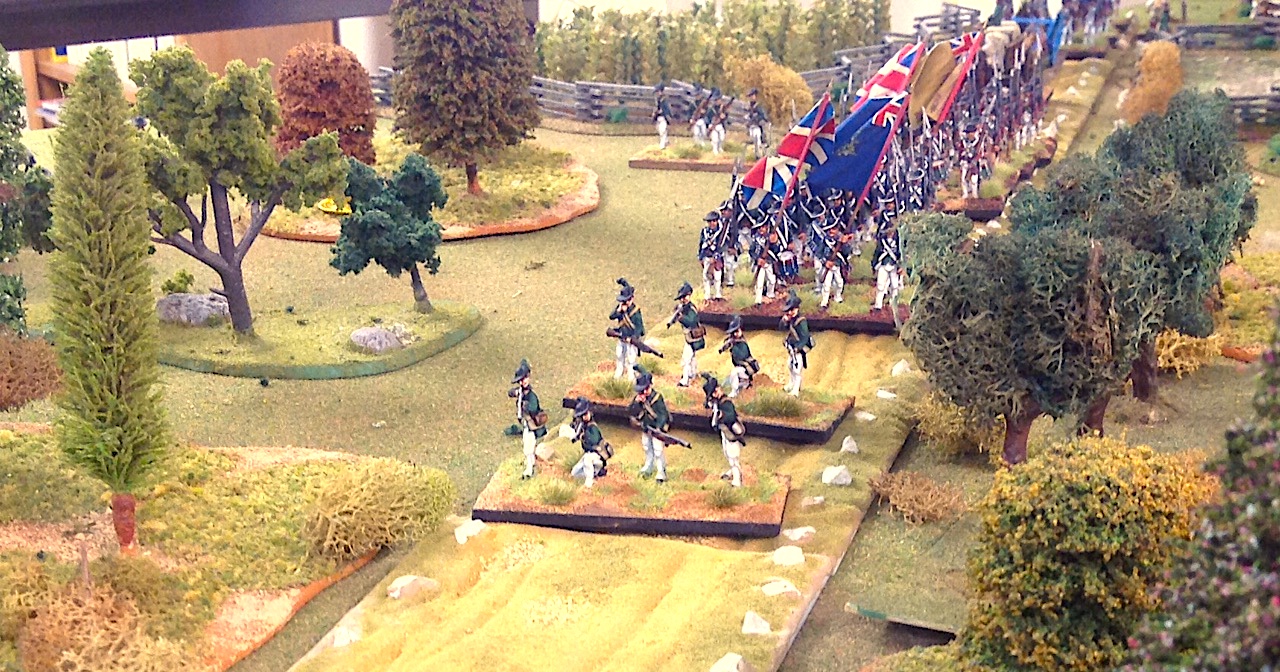
 |
| The British column of march on the road to Camden. Green Loyalist regiment in the lead followed by the 5th Regiment. Light troops cover the front and flanks of the column |
 |
| Another view of the British column. Westbury Plantation is represented by the white clapboard buildings in the background. A more common backcountry log cabin farmstead is in the foreground. |
 |
| Ferguson’s Rifles light infantry lead the column towards the Westbury Crossroads. |
 |
| All appears quiet at the Westbury Crossroads. (the gold poker chips represent potential ambush sites) |
The first ambush at the Westbury Crossroads
 |
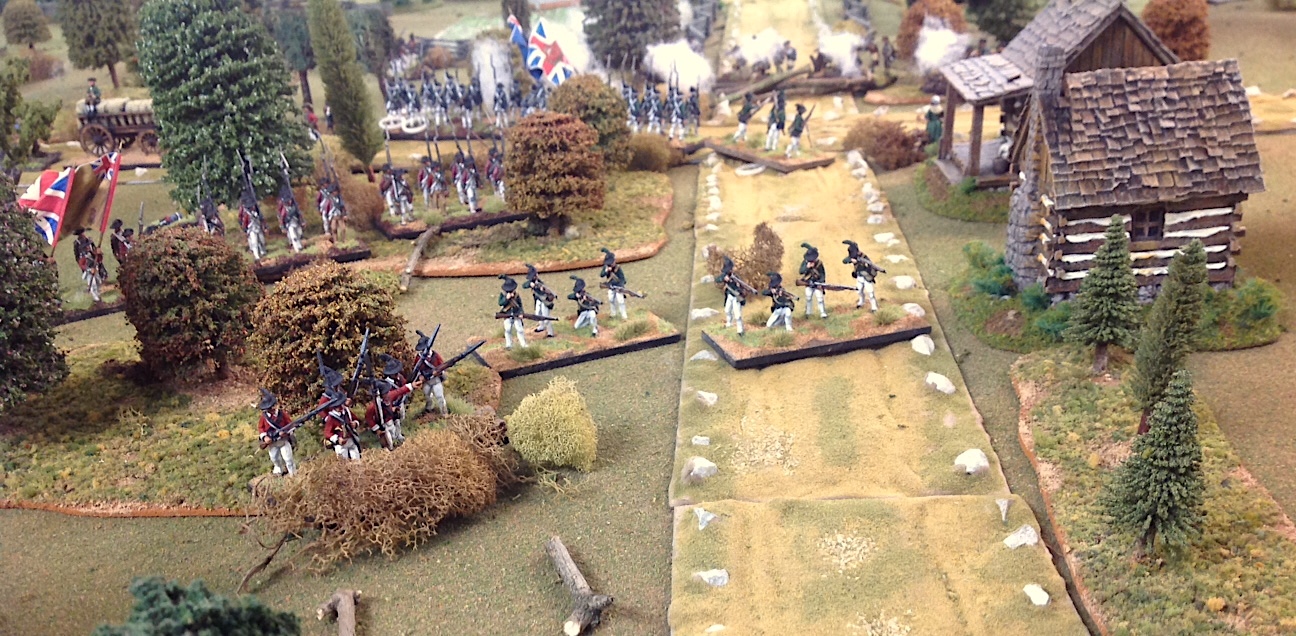
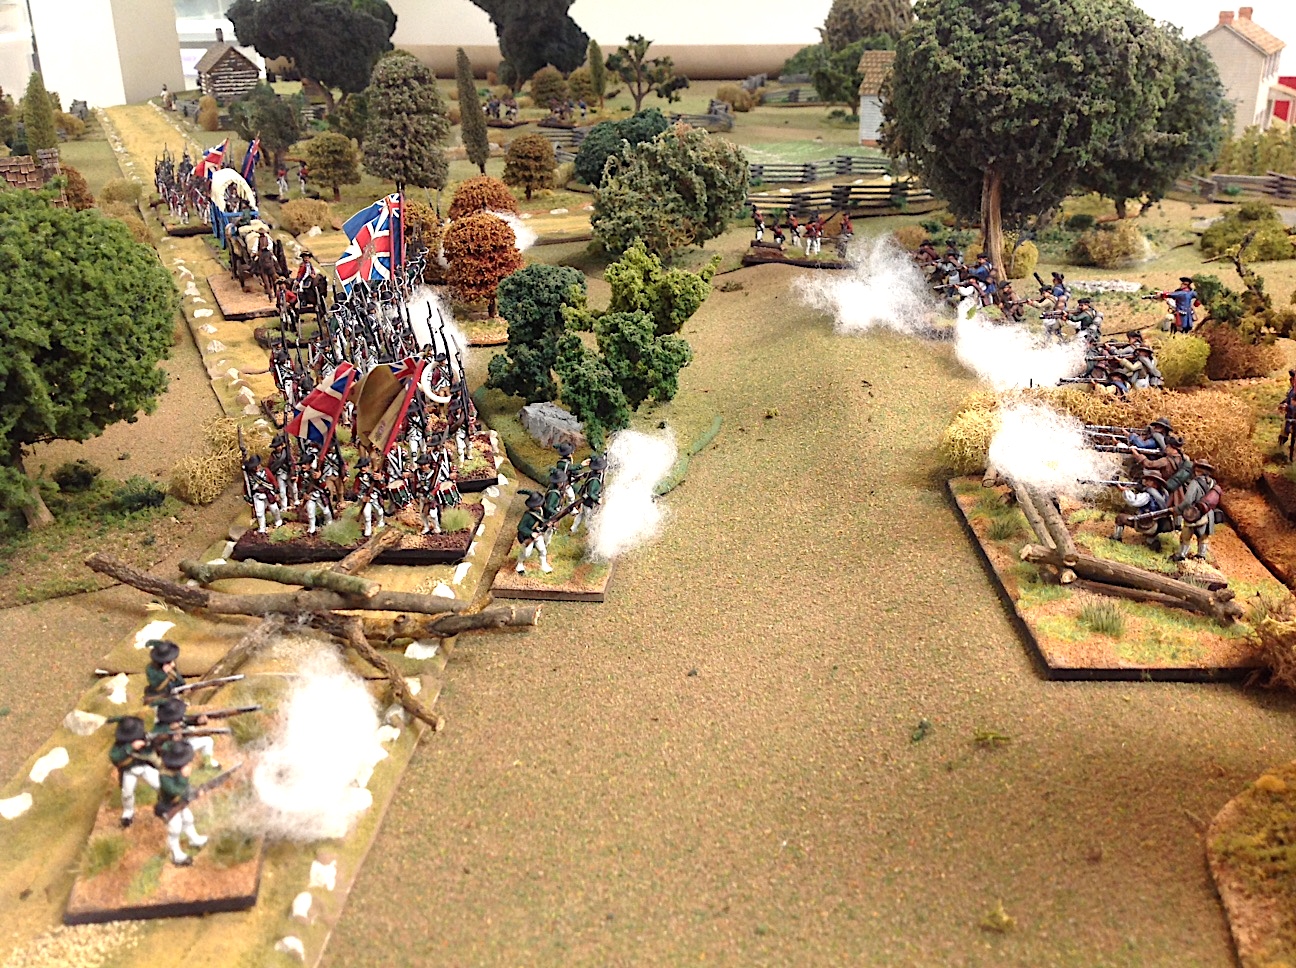
| British light company (in red) springs the first ambush of the game. The militia fire on the British column after they are discovered. |
 |
| Firing erupts on both flanks of the column! Note the roadblock of felled trees across the road leading off to the right. |
 |
| The first militia unit that started the whole shebang takes a lot of casualties and routs down the road and into the safety of the woods. Routed units get two attempts to try to rally. If they fail then the unit is removed from the game. |
 |
| The threat on the left has been driven off, so the Loyalist regiment faces to its left to fire at the second militia unit on the righthand side of this picture. |
 |
| Lord Rawdon reorganizes his column and places the 5th Foot at the head of the column, replacing the Loyalists who have taken a lot of casualties and are now a very fragile regiment. Leaving them at the head of the column would be risky as they are more likely to fail morale and run away. |
The second ambush
 |
| The Patriots block the road with felled trees. It takes a full turn stationed in front of the barrier to remove the logs. |
|
The riflemen inspect some rifle pits off to the left. These have been abandoned and would have provided perfect cover for another ambush at the barricade. All seems well when suddenly another militia unit, on the hillside on the right, pops up and fires into the flank of the 5th Regiment. Both the 5th Regiment and the Loyalist Regiment turn and form line facing the new threat.
|
| Light troops spot more militia on top of the hill, springing the second ambush at the road block. |
 |
| The Rebels fire and fall back, allowing the wagon train to continue down the road, passing the crossroads. |
 |
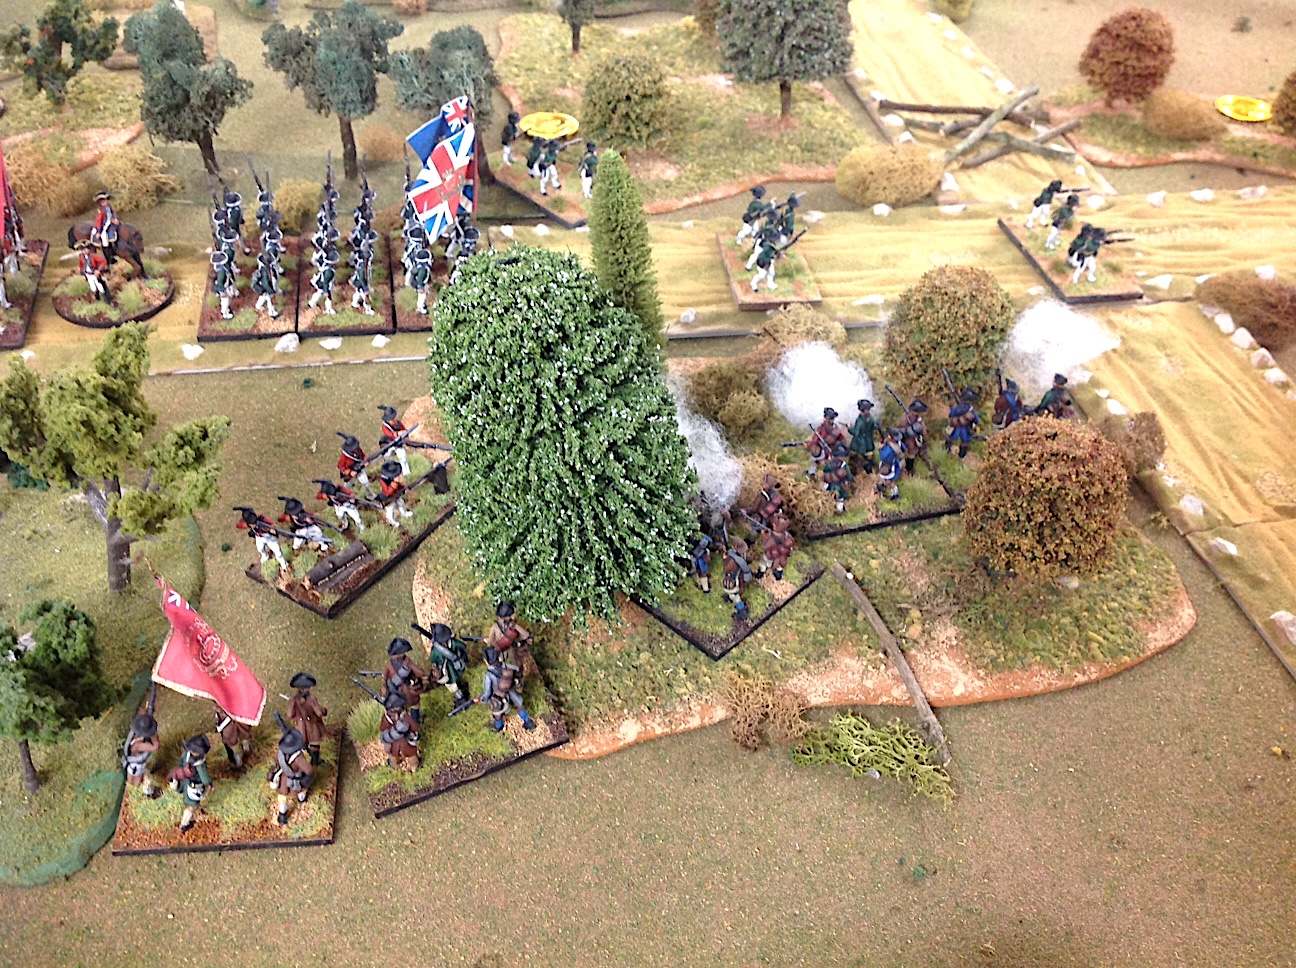
| Suddenly, Marion’s mounted militia, now dismounted, emerge from the woods to fire into the rear of the Loyalist and 5th Regiments. They pull off a „fire and retire“ move so that the British have no targets when they attempt to fire back at the threat. |
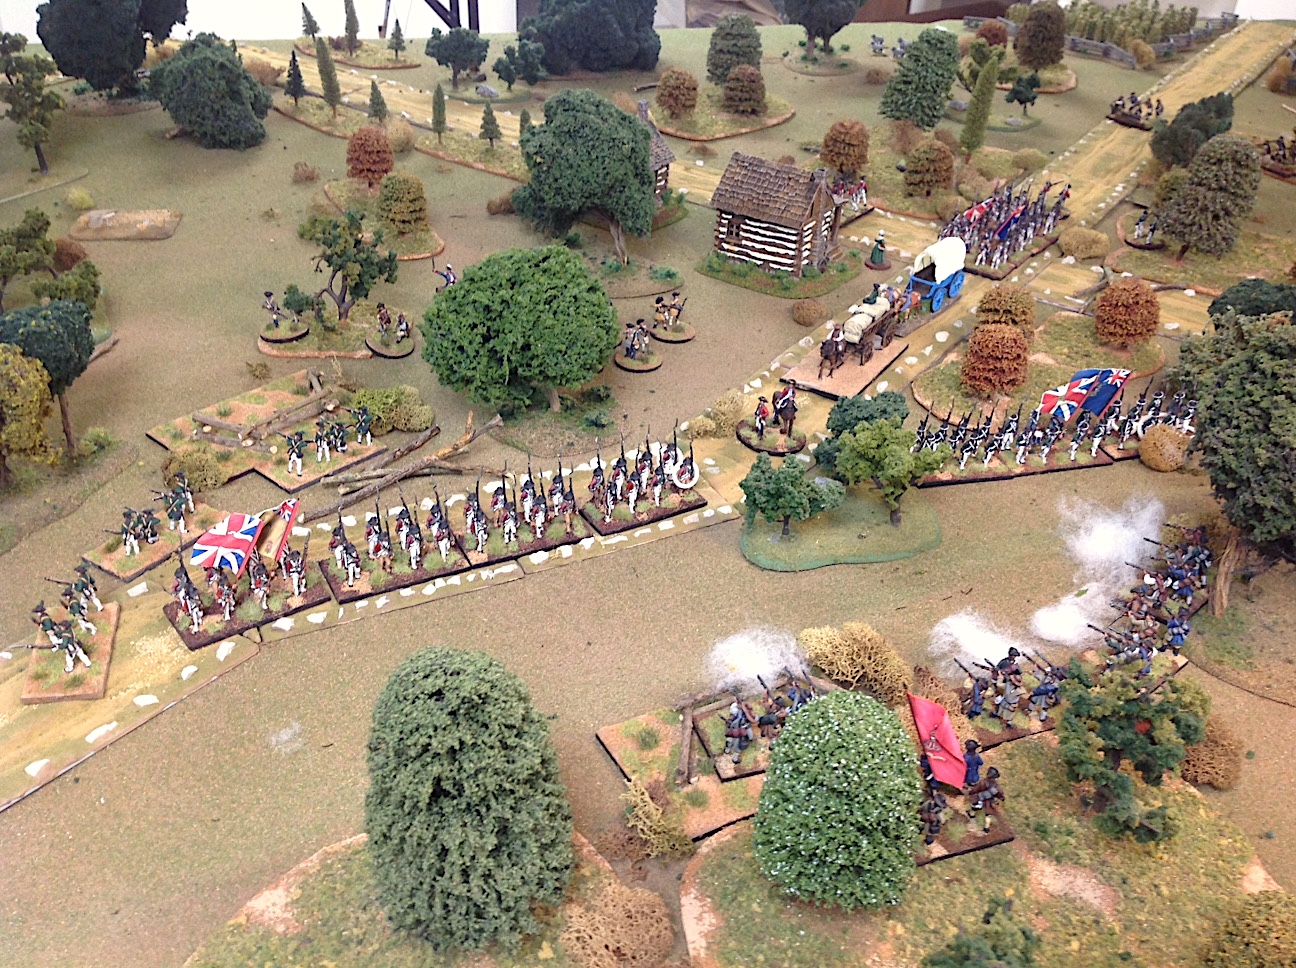 |
| Overhead view of the second ambush as it developed. The 5th Regiment had just cleared the road barrier when firing erupted from the top of the hill. Both the 5th and the Loyalists turned to their right, into line, and faced the new threat from atop the hill. Facing such a large collection of muskets, the rebels wisely retired from the crest of the hill. |
The third ambush
 |
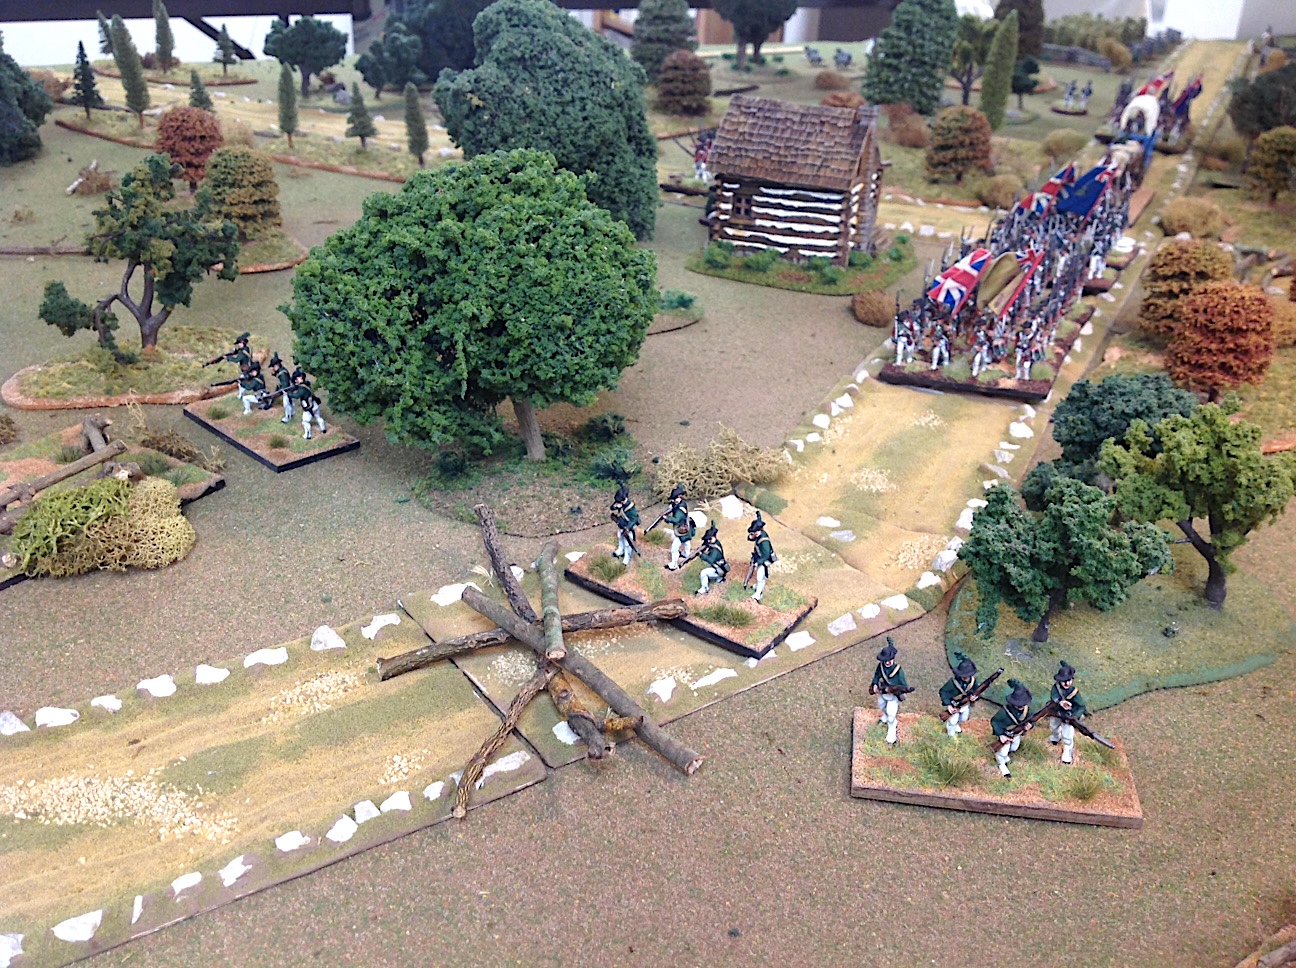
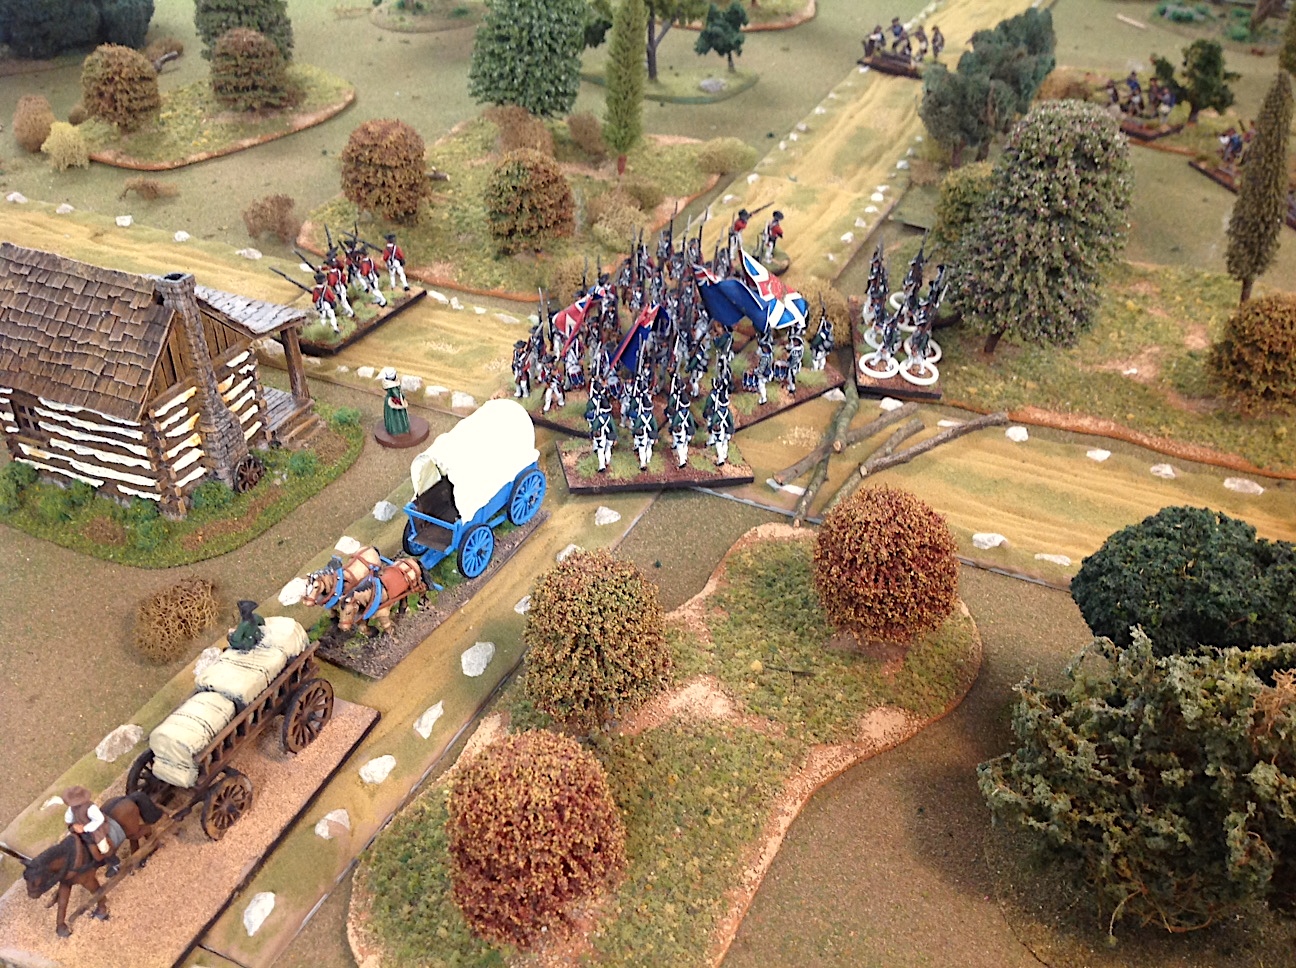
| Ferguson’s Riflemen clear the logs from the road. The 5th Regiment awaits behind and light companies delve into the woods to detect any rebels laying in ambush. |
 |
| The Loyalist regiment routs – it had taken lots of casualties earlier in the game and its morale was already on the edge of shaky, so one more casualty caused the Loyalists to rout, running smack dab into the the 4th Regiment which was bringing up the rear of the column. |
The Loyalists had another attempt to rally and they failed, so they continued to rout and ran right into the welcoming arms of the rebel mounted militia. The Loyalists had no choice but to surrender or get a little taste of Tarleton’s Quarter. They chose wisely and surrendered.
 |
| The stalwart veterans of the British 4th Regiment quickly recover and hurry on down the Camden road so that they can catch up with the rest of the column. They jeer at the Loyalist regiment which they watch running away. Marion’s mounted militia (currently dismounted) can be seen next to the log cabins at the intersection. |
The game had gone nine turns up to the point where the Loyalist Regiment routed and surrendered. Since this achieved the victory condition of the Patriots, Francis Marion decided that there was no more profit to continuing the fight, so he ordered his army to retire back into the woods and let the remaining British forces march away to Camden.
Conclusion
Dieser Artikel stammt von einer der angeschlossenen Quellen. Bitte honoriere die Arbeit der Autoren indem du ihren Webseite besuchst.
Artikelquelle besuchen
Autor: Der Alte FritzDer Alte Fritz JournalDer Alte Fritz JournalDer Alte Fritz Journal
Powered by WPeMatico